Screen recording on Android TV has become increasingly user-friendly with the introduction of native screen recording features and the availability of third-party apps. Whether you’re looking to create tutorials, share gameplay, or simply capture content from your Android TV, our guide provides an easy method to accomplish this. We’ll explore the built-in screen recording tool, recommend some third-party apps for advanced users, and provide troubleshooting tips to ensure a smooth recording experience.
Key Takeaways
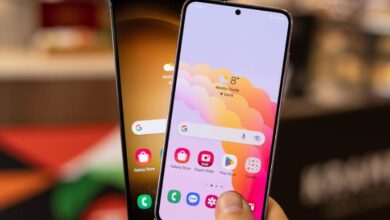
- Most modern Android TVs come with a native screen recording feature that can be accessed through the Quick Access Panel.
- Third-party apps like XRecorder offer additional control over the screen recording process, including video quality and frame rate adjustments.
- Screen recording can be used for a variety of purposes, such as creating tutorials, sharing gameplay, or developing app demos.
- Troubleshooting common issues like audio and video sync or recording interruptions is essential for a seamless screen recording experience.
- When using screen recording on Android TV, it’s important to consider privacy, security, and optimizing the video for different platforms.
Understanding Android’s Native Screen Recording Feature

The Evolution of Screen Recording on Android
Remember the days when screen recording on Android felt like rocket science? I sure do. We had to rely on third-party apps or even hardware like capture cards to grab footage from our screens. But boy, have things changed! Google stepped up the game with Android Lollipop, introducing a native screen recording feature that made capturing our screen’s antics as easy as pie.
Android KitKat was where it all began, though, with apps paving the way for what’s now a built-in convenience. Fast forward to today, and you’ll find the screen record option sitting snugly in the quick settings of most modern smartphones. No more fumbling around with extra downloads—unless, of course, you’re after those fancy features that some third-party apps offer.
It’s fascinating to see how screen recording on Android has evolved from a clunky, app-dependent process to a seamless, integrated feature.
While the native recorder does a stellar job for basic needs, there’s still a place for those specialized apps. They come in handy when you’re looking to tweak video quality, frame rates, or need advanced editing tools. It’s all about having options, and Android gives us plenty.
Accessing the Screen Recording Function
Getting to the screen recording feature on your Android TV is a breeze. First, you’ll want to pull down the notification shade; this is where you’ll find the screen recording option. It’s as simple as tapping the icon to get started. But before you dive in, let’s make sure you’re set up for success.
To ensure a smooth recording experience, check these settings:
- Resolution: Higher for better quality, lower for smaller file sizes.
- Orientation: Choose landscape or portrait based on your content.
- Audio source: Decide if you want to record external sounds or internal audio.
Remember, the screen recording function is a powerful tool that can capture everything on your screen, so it’s perfect for creating tutorials or recording gameplay. Just keep in mind that privacy is important—don’t record sensitive information.
When you’re ready to stop recording, simply pull down the notification shade again and tap the ‘Stop’ button. Your video will be saved automatically to your device.
Advantages of Using the Native Recorder
One of the biggest perks of using the native screen recorder on my Android TV is the sheer convenience. It’s integrated right into the system, so I don’t have to fuss with downloading extra apps or worrying about compatibility issues. Plus, it’s reassuring to know that the feature is designed specifically for my device, ensuring a smoother experience.
Another advantage is the ease of access. With just a few taps, I’m ready to start recording. I can even tweak settings like recording quality and frame rate before I begin, which is great for getting the video just right. Here’s a quick list of benefits:
- No additional downloads required
- Tailored to work seamlessly with Android
- Quick access from the Quick Settings panel
- Customizable settings for quality and performance
Remember, you can’t change settings mid-recording, so make sure to adjust everything beforehand!
Lastly, using the native recorder often means better stability and fewer bugs, since it’s a part of the Android ecosystem. This is especially important when I’m capturing something I can’t redo, like live gameplay or a one-time event. It’s just one less thing to worry about.
Step-by-Step Guide to Using Android’s Built-In Screen Recorder

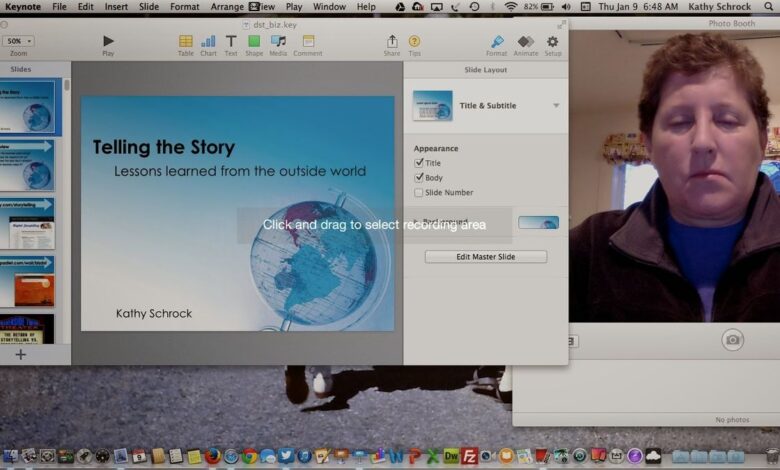
Navigating to the Quick Access Panel
Getting to the Quick Access Panel on your Android TV is a breeze. First, swipe down twice from the top of your home screen. This reveals the Quick Settings panel, where you’ll find various tiles for quick actions. Look for the Screen recording tile; it might be named slightly differently on your device, but it should be easy to spot.
Once you’ve located the Screen recording option, give it a tap to get started. If it’s not immediately visible, you might need to edit the Quick Settings panel to add the tile. This is usually done by entering an edit mode, which allows you to drag and drop your preferred tiles into the panel for easier access.
Remember, the steps can vary slightly depending on your device model and the version of Android it’s running. But don’t worry, the process is generally intuitive and user-friendly.
Starting Your Screen Recording Session
Once you’ve got everything set up, it’s time to dive into the actual recording. Starting your screen recording session is a breeze on Android TV. Just follow these simple steps:
- Navigate to the screen you want to record.
- Pull down the Quick Access Panel and find the screen record icon.
- Tap the icon, and a message will appear to confirm the start of your recording.
- Select ‘Start Now’ to begin capturing your screen.
Remember, once the recording starts, you can navigate away from the panel and continue using your TV as normal. Everything on screen will be captured, so make sure you’re only displaying what you want to record.
When you’re done, accessing the stop function is just as straightforward. But we’ll get to that in a bit. For now, focus on capturing the content you need. Whether it’s a gameplay session, a tutorial, or just a cool interface trick you’ve discovered, How to Screen Record Android TV – Easy Method has got you covered.
Tips for Recording High-Quality Videos
When I’m aiming for high-quality screen recordings on my Android TV, I always keep a few tips in mind. Firstly, setting the right resolution is crucial. Most Android TVs support up to Full HD, so I make sure to adjust the settings accordingly. Here’s a quick rundown of what I consider:
- Resolution: Set it to the highest supported by your TV, typically 1080p.
- Frame rate: Aim for 60fps for smooth playback, especially for fast-moving content.
- Bitrate: Higher bitrate means better quality, but also larger file sizes.
I also pay attention to the audio quality. If I’m recording a show or gameplay, I want the sound to be as clear as the picture. So, I check if the internal audio recording is enabled and if not, I look for ways to include it.
Remember, the goal is to balance quality with file size. You don’t want to run out of storage halfway through your favorite show!
Lastly, I make sure there’s enough storage space on my device before starting. It’s a bummer to get a ‘storage full’ notification when you’re in the middle of recording something epic. So, I always clear out unnecessary files and, if possible, connect a USB for extra space. This way, I can relax and enjoy my screen recording session without any hiccups.
Exploring Third-Party Screen Recording Apps

When to Consider a Third-Party App
Sometimes, the native screen recording options on Android TV just don’t cut it. When you need more advanced features or customization, that’s when you should consider a third-party app. These apps often offer enhanced control over recording settings, such as resolution, frame rate, and even the ability to record internal audio.
Third-party apps can be particularly useful if you’re looking to create content that stands out, like tutorials or gameplay videos. Here’s a quick list of scenarios where a third-party app might be the better choice:
- You require higher video quality than the default settings provide.
- You need to record internal audio, which isn’t always possible with native tools.
- You’re looking for editing features to polish your videos before sharing.
Remember, while third-party apps expand your capabilities, they also come with considerations regarding data safety and privacy. Always check the app’s permissions and the data it collects before downloading.
Lastly, keep an eye on tech news and reviews to stay updated on the latest and most reliable screen recording apps. It’s a great way to ensure you’re using the best tools available for your Android TV.
Top Screen Recording Apps for Android
When I set out to find the best screen recording apps for Android, I stumbled upon a treasure trove of options. But let’s cut to the chase, here are some of the top picks that have caught my eye:
- AZ Screen Recorder: A fan favorite for its user-friendly interface and robust features.
- InShot Screen Recorder: Known for its editing capabilities right after recording.
- Link to Windows: Ideal for those who want to integrate with their PC environment.
- Twitch: Perfect for gamers looking to stream their gameplay.
- Vysor: Offers a unique way to control your Android device from your computer.
Each app brings something special to the table, but if I had to give you a pro tip, it would be to look for one that balances performance with ease of use. And speaking of performance, AZ Screen Recorder stands out with its no watermark policy, no time limits, and a handy built-in video editor for those quick trims and cuts.
Customizing Settings for Optimal Performance
Getting the best performance out of your screen recording on Android TV isn’t just about hitting the ‘record’ button; it’s about diving into the settings to make sure everything is just right. Tweaking the settings can make a huge difference in the quality of your recordings. For instance, you might want to adjust the resolution or frame rate to match the content you’re capturing.
Here’s a quick rundown of what you might consider adjusting:
- Resolution: Higher for clarity, lower for smaller file sizes.
- Frame rate: Go for 60 FPS for smooth action, but remember it might require a premium subscription in some apps.
- Audio: Enable or disable according to whether you need your voice or system sounds in the recording.
Remember, the goal is to balance quality with performance. You don’t want a high-quality video that stutters or takes up all your storage space.
Once you’ve got your settings dialed in, you’re all set to capture your Android TV screen with confidence. Just keep in mind that some settings may be locked behind a paywall, depending on the app you’re using.
Recording Your Android Screen with XRecorder

Installing and Setting Up XRecorder
Getting XRecorder up and running on your Android TV is a breeze. First things first, head over to the Google Play Store and grab the XRecorder app. Once it’s installed, open it up and you’ll be greeted with a few simple steps to get things rolling.
Here’s a quick rundown of what you’ll need to do:
- Tap on ‘Enable floating icon’ to let XRecorder work its magic over other apps.
- You’ll land on the ‘Display over other apps’ screen. Just scroll down, find XRecorder, and flip the switch to ON.
- Jump back into XRecorder and hit ‘Allow’ to give it the permissions it needs to function properly.
Remember, without these permissions, XRecorder won’t be able to record audio or display over other apps, which is pretty much the whole point, right?
Once you’ve got the permissions sorted, hit the ‘Record’ button and give the app microphone access by choosing ‘While using the app’. This is crucial because without mic access, you’ll end up with silent videos. Finally, tap ‘Start now’ and you’re off to the races, recording whatever’s happening on your screen.
Recording and Editing with XRecorder
Once I’ve got XRecorder installed on my Android TV, I’m ready to dive into recording. Starting a session is a breeze; I just tap the Record button and grant the app microphone access. Without this step, I wouldn’t be able to capture any audio, which is crucial for a good video.
Here’s a quick rundown of the steps I follow:
- Open XRecorder and enable the floating icon.
- Allow the app to display over other apps.
- Grant the necessary permissions.
- Hit the Record button and choose ‘While using the app’ for microphone access.
- Select ‘Start now’ to kick off the recording.
Editing is just as straightforward. XRecorder offers a suite of editing tools that let me trim, cut, and even add text to my recordings. It’s handy for highlighting important moments or instructions. Plus, I can mark significant points during the recording, which is perfect when I’m creating tutorials or gameplay videos.
Remember, always stop your recordings properly to ensure the file saves correctly. It’s a simple step, but it makes all the difference when I’m looking to share my videos with friends or upload them to a website page featuring Xiaomi products and tech news.
Exporting and Sharing Your Recorded Videos
Once you’ve wrapped up your recording session, it’s time to show off your work. Exporting your video is a breeze with XRecorder. You can choose the desired video format and quality, ensuring your content looks great on any platform. After saving your masterpiece, sharing it with friends or on social media is just a few taps away.
- Export options include:
- MP4, AVI, MOV
- HD, Full HD, or 4K resolution
Remember, the key to a successful share is choosing the right format and quality for your audience. For instance, if you’re aiming for Instagram, a high-quality MP4 file in HD should do the trick.
Keep in mind that the size of your video file can affect upload times and data usage. So, if you’re on a limited data plan, consider compressing your video before sharing.
Lastly, don’t forget to check the privacy settings when sharing your videos. You want to make sure you’re only sharing content with your intended audience. With everything set, you’re ready to take your content live and impress your viewers!
Troubleshooting Common Screen Recording Issues

Solving Audio and Video Sync Problems
When screen recording on Android TV, you might sometimes face the frustrating issue of audio and video being out of sync. The first step is to check if your device’s system audio and microphone settings are properly configured. If you’re using a third-party app, make sure it’s updated to the latest version, as this can often fix sync issues.
- Ensure your Android TV and recording app are updated
- Restart your device to clear temporary glitches
- Adjust the audio delay settings if available in your app
Remember, a stable internet connection is crucial if you’re streaming content that you’re trying to record.
If you’ve tried these steps and still experience problems, it might be time to explore advanced settings or even consider a different screen recording solution. Sometimes, customizing settings for optimal performance can make all the difference. And if you’re recording gameplay, make sure to follow a quick guide to fix issues like checking network connection and updating your game.
Dealing with Recording Interruptions
We’ve all been there – you’re in the middle of recording your screen when suddenly, something interrupts the process. It could be an incoming call, a notification, or even an accidental press of the wrong button. The key is to stay calm and know how to quickly resume or stop your recording. Most Android TV screen recording apps offer a quick way to pause or end a session. For instance, you might find a ‘Stop Recording‘ notification in the app’s notification bar. Simply select it to end your session.
If you’re using an app with a floating record icon, you can tap this to either pause or stop the recording. Remember, if you need to stop recording in a hurry, look for the square icon in the recording toolbox, usually found at the bottom right corner of your screen. Here’s a quick rundown of what to do:
- Tap the floating record icon or notification to access recording controls.
- Select the square icon to stop recording.
- Drag the floating icon to a cross button to close it and end the session.
Sometimes, you might encounter apps that don’t make it easy to stop a recording. In such cases, feedback to developers is crucial. They need to know that features like an easily accessible stop button are important for a smooth user experience.
Managing Storage and File Size Concerns
When I’m screen recording on my Android TV, I always keep an eye on the storage space. It’s easy to run out of room if you’re not careful, especially with high-quality videos. To manage this, I adjust the recording settings to lower the resolution and frame rate, which significantly reduces the file size without sacrificing too much quality.
Here’s a quick tip: if you’re planning to share your recordings or need them for tutorials, using the Record Microphone Audio feature is a game-changer. It lets you narrate the steps, making your content more engaging and informative.
Remember, the goal is to strike a balance between video quality and file size. You don’t want to compromise the viewing experience, but you also need to be mindful of how much space your recordings take up.
Lastly, consider the type of external storage you’re using. Some smart TVs have limitations on the USB drives they recognize, and you might need an external hard drive with its own power source. Keep these factors in mind to avoid any hiccups during your recording sessions.
Enhancing Your Screen Recordings with Advanced Techniques

Incorporating External Audio
When I’m looking to enhance my screen recordings on Android TV, adding external audio is a game-changer. It’s not just about capturing what’s on the screen; it’s about creating a complete audio-visual experience. For instance, if I want to add commentary or background music, I’ll need to incorporate external audio sources.
To get started, I’ll select a microphone from the Microphone menu to add my voice narrations. If I want to include both the movie sound and my computer’s sound, I’ll choose a device under the System Audio menu. And here’s a cool tip: for a picture-in-picture effect, I can select a camera under the Webcam menu.
Remember, the key to a successful screen recording with external audio is to ensure that all audio sources are properly synced. This might require some trial and error, but the end result is worth it.
Here’s a quick checklist to make sure I’ve got everything set up right:
- Select the right microphone for voice narrations
- Choose the correct system audio source
- Test for proper audio synchronization
- Consider adding a picture-in-picture effect for a dynamic recording
Using Picture-in-Picture Mode
When I’m looking to add a bit more flair to my screen recordings, I often turn to the picture-in-picture (PiP) mode. It’s a fantastic way to show both the main content and a smaller window, usually for a webcam feed or additional footage. Boldly stepping up my tutorial game, I can add annotations or even a live commentary.
To get started with PiP, I first make sure my recording app supports this feature. Here’s a quick rundown of the steps I follow:
- Open the recording app and select the PiP mode.
- Choose the recording area or region for the main content.
- Customize the PiP window size and position on the screen.
- Select the appropriate audio inputs for both the main and PiP content.
Remember, the key to a successful PiP recording is balancing the main content with the secondary video feed without overwhelming your viewers.
Lastly, I always play around with the settings to find the perfect mix of audio and video quality. It’s all about creating an engaging experience for those watching my screen recordings.
Creating Tutorials and Gameplay Walkthroughs
When I’m looking to share my gaming achievements or create a tutorial, screen recording on Android TV is a game-changer. It’s simple to capture every moment of gameplay or step-by-step instructions for any app. Here’s how I do it:
- I start by locating the Android Recorder button to kick off the recording.
- While recording, I make sure to enable Facecam if I want to capture my reactions.
- For tutorials, I use the Brush Tools to highlight important areas on the screen.
- Once done, I stop the recording and access the video file for editing or sharing.
Remember, for Android 10 and above, you can record internal audio without any background noise, making your tutorials and walkthroughs crystal clear.
It’s also worth noting that some screen recorders support up to 120 FPS, which is perfect for capturing high-quality gameplay. Whether you’re aiming to help others with a tricky app or showcasing your gaming skills, the right tools make all the difference.
Finalizing Your Recording and Accessing the Video File

Stopping the Recording Properly
Wrapping up your screen recording session on Android TV is a breeze, but it’s crucial to do it right to ensure your video is saved properly. Press the stop button in the notification bar or the recording toolbox to halt the recording. This action typically triggers a mini control bar or a countdown, confirming the end of your session.
Here’s a quick rundown of the steps:
- Locate the ‘Recording Screen’ notification or the recording toolbox.
- Tap on the stop button, which might be a red square or a square icon.
- Wait for the confirmation that the recording has stopped.
- The video will then be saved automatically and listed in your gallery or a specified folder.
Remember, if you can’t find a stop button during recording, you might need to access the app to turn it off. This is a common hiccup that some users face, so it’s worth checking if your screen recording app has an easily accessible stop function.
After stopping the recording, you’ll often have options to edit, share, or delete the video right away. This convenience allows you to manage your recordings without delay, making the process smooth and user-friendly.
Locating and Playing Back Your Video
Once you’ve stopped your screen recording, the next step is to find and play back the video. The process is straightforward and doesn’t require any technical know-how. Typically, the video file will be automatically saved in a default location, such as the ‘Screen Recordings’ or ‘Videos’ folder on your Android TV.
To locate your recording, simply navigate to your device’s file manager. Here’s a quick rundown:
- Open the file manager app on your Android TV.
- Look for a folder named ‘Screen Recordings’ or ‘Videos’.
- Select your recorded video file to preview it.
If you’re using a third-party screen recording app, the file might be saved within the app itself. In that case, open the app and you should find an option to view your recordings. Some apps even allow you to play the video directly from their interface, making it even more convenient.
Remember, if you’re having trouble finding your video, you can always use the search function in your file manager to look for files with a ‘.mp4’ or similar video format extension.
Editing and Sharing Your Screen Recording
Once you’ve captured the perfect moment on your Android TV, it’s time to polish and share it with the world. Editing your screen recording is straightforward. Most screen recording apps, including the native Android feature, offer basic editing tools. You can trim the footage, add text, or merge clips to create a seamless video.
- Share your recording clips with friends on social networks.
- Use the on-screen options to delete, edit, or share the screen recording.
- Save recorded files to a cloud storage system for easy access and organization.
When you’re ready to share, tap the ‘Share’ button and choose your preferred platform. Whether it’s social media, email, or cloud storage, sharing your screen recordings is a breeze. Remember, the key to a great screen recording is not just capturing the content but also presenting it in an engaging way.
Keep in mind that sharing content responsibly is crucial. Before you hit that share button, make sure you’re not violating any privacy policies or copyrights.
Best Practices for Screen Recording on Android

Preparing Your Device Before Recording
Before I dive into recording my Android TV screen, I always make sure my device is prepped and ready to go. Clearing any unnecessary apps running in the background is a must to ensure smooth performance. I also check my storage space because I don’t want to run out mid-recording. Here’s a quick checklist I follow:
- Ensure device is fully charged or plugged in
- Close background apps for better performance
- Check available storage space
- Adjust recording settings to manage file size
Remember, if you’re planning to explain things as you go, turning on the Record Microphone Audio option is super handy. It lets me add my commentary in real-time, which is great for tutorials or walkthroughs.
Just a heads up, if you’re aiming for high-quality recordings, be mindful of the file size. A higher resolution means a larger file, which can be tricky to share.
Lastly, I always double-check my recording settings. I want to make sure I’ve selected the right area of the screen and that my aspect ratio is locked if I’m going for a custom size. It’s these little preparations that make the recording process a breeze.
Ensuring Privacy and Security During Recording
When I’m screen recording on my Android TV, I always make sure to prioritize my privacy and security. It’s crucial to understand the app permissions and data sharing policies of any screen recording app I use. For instance, some apps might share data like my location or app activity with third parties, which isn’t ideal.
Privacy settings are my go-to section in any app. I check to ensure that data is encrypted in transit and that I have the option to request data deletion if needed. Here’s a quick checklist I follow to keep my recordings secure:
- Review the app’s privacy policy.
- Check which data types the app collects and shares.
- Confirm that data encryption is in place.
- Look for options to delete data if necessary.
Remember, while sharing my recording clips with friends or on social networks, I always double-check that no sensitive information is visible on screen. It’s better to be safe than sorry!
Optimizing Video for Different Platforms
When I’m done recording my Android TV screen, I always think about where I’m going to share the video. Different platforms have different requirements and audiences, so I make sure to optimize my recordings accordingly. For instance, if I’m targeting social media like Instagram, I’ll utilize features like Reels, Live, Stories, and IGTV to engage my audience and showcase my creativity.
One thing I’ve learned is that not all video formats play nice with every device or platform. I often export movies in various formats such as MP4, AVI, MOV, MKV, MP3, and FLAC. This ensures my videos are ready to be played on a wide range of devices and platforms. It’s a bit like making sure you’ve got the right key for the right lock.
Remember, it’s not just about the recording; it’s about the presentation. Tailoring your video to fit the platform can make a huge difference in how it’s received.
Here’s a quick checklist I use to make sure my videos are platform-ready:
- Trim and edit for content relevance
- Compress to meet file size limits
- Apply platform-specific features (e.g., subtitles for Facebook)
- Test playback on different devices
By taking these extra steps, I ensure that my screen recordings are not just saved memories but are also primed for sharing, storytelling, and engaging with my audience no matter where they watch.
Comparing Native and Third-Party Screen Recorders

Ease of Use and Accessibility
When it comes to screen recording on Android, ease of use and accessibility are key factors that determine whether I’ll stick with a native feature or switch to a third-party app. The native screen recorder is usually just a few taps away, integrated into the Quick Settings panel. It’s straightforward, with no need to install anything extra.
However, third-party apps like RecMe Screen Recorder offer more flexibility. They often come with additional features such as editing tools and customizable settings, which can be a game-changer for those who need more than just the basics. Here’s a quick comparison:
- Native Recorder: Accessible from Quick Settings, minimal options.
- Third-Party Apps: Require installation, offer advanced features.
Remember, while third-party apps can provide more control over your recordings, they may also require you to navigate through more settings and options, which can be a bit overwhelming for some users.
Feature Set and Customization Options
When it comes to screen recording on Android TV, the feature set and customization options can vary widely between native and third-party apps. Native screen recorders often provide a straightforward experience with essential functions, but may lack advanced features. On the other hand, third-party apps offer a plethora of customization options that cater to different needs.
For instance, you might find options to change video resolution, frame rate, or even add a personal touch with virtual backgrounds and filters. Some apps allow you to fine-tune settings like audio sources, ensuring that you capture both system sounds and voice narrations. If you’re into creating tutorials or gameplay videos, features like picture-in-picture (PIP) effects can be incredibly useful.
Remember, the right tool for you depends on what you’re looking to achieve with your screen recordings. Whether it’s a simple clip or a fully-edited video, there’s an app out there that fits the bill.
Here’s a quick list of customization features you might encounter:
- Virtual backgrounds and filters
- Video editing capabilities
- Selectable audio sources (system audio, microphone)
- PIP effects
- Customizable recording areas (full screen or specific regions)
- Adjustable video resolution and frame rate
Deciding Which Option is Best for You
Choosing between the native Android screen recorder and third-party apps boils down to your specific needs and preferences. If you’re after simplicity and convenience, the built-in feature is unbeatable. It’s right there in the Quick Access Panel, ready to go without any additional downloads or setups. However, if you crave more control over your recordings, like changing video quality or frame rate, a third-party app might be your savior.
For instance, while the Pixel lineup lacks certain settings, third-party apps fill that gap with a variety of customizable options. Remember, though, that higher quality settings can lead to larger file sizes, which is crucial if you’re planning to share your recordings.
When you’re torn between choices, consider the type of content you’re recording. Are you creating a tutorial where you need to explain steps with your voice? Then, the Record Microphone Audio feature could be a deciding factor.
Ultimately, it’s about finding a balance between ease of use and the features you can’t live without. Take a moment to reflect on what matters most for your screen recording endeavors before making a choice.
Frequently Asked Questions About Android Screen Recording

Can I Record Without a Watermark?
Absolutely! One of the biggest pet peeves for screen recording enthusiasts is the unwanted watermark that often comes with free apps. But don’t worry, I’ve got you covered. You can record your Android TV screen without any pesky watermarks. There are several apps available that let you do just that. For instance, some apps offer a ‘no watermark’ feature right off the bat, while others might require you to watch an ad or make a small in-app purchase.
Remember, the goal is to have a clean and professional-looking video, and a watermark can sometimes get in the way of that.
Here’s a quick rundown of what to look for in a screen recording app to ensure you’re watermark-free:
- No Watermark: Check if the app explicitly states that it’s watermark-free.
- No Root Needed: Look for apps that don’t require you to root your device.
- No Time Limit: Some apps impose recording time limits; find one that doesn’t restrict you.
By keeping an eye out for these features, you’ll be able to create high-quality recordings that look just the way you want them to.
How to Record with Internal Audio?
Recording the screen of your Android TV with internal audio can be a game-changer, especially when you’re aiming to capture the essence of a game or an app’s audio. Since Android 10, the ability to record screen with the original sound has been a nifty addition. This means you can create recordings that include the app or game’s internal audio, making your content more immersive and engaging.
To ensure you capture internal audio, follow these simple steps:
- Open the screen recording app on your Android TV.
- Navigate to the settings or preferences section.
- Look for an option labeled ‘Internal Audio’, ‘System Sound’, or something similar.
- Select this option to enable recording of the sounds played by your TV.
Remember, if you’re planning to add your own commentary, you’ll need to grant microphone access to the app. This will allow you to record both the internal audio and your voice simultaneously. Just be mindful of the file size, as higher quality audio can lead to larger recordings.
It’s essential to strike a balance between audio clarity and file size to avoid bulky videos that are hard to share.
What to Do If My Device Doesn’t Support Screen Recording?
If you’ve hit a snag because your Android TV doesn’t have a native screen recording feature, don’t worry, I’ve got you covered. First things first, check if your device’s operating system is up to date. Older versions of Android may not support screen recording, so an update could be the simple fix you need.
In case updating isn’t an option or doesn’t solve the issue, you can turn to third-party apps. These apps are designed to fill the gap and offer screen recording capabilities even when your device doesn’t natively support it. Here’s a quick rundown of what you can do:
- Update your Android TV to the latest operating system, if possible.
- Explore third-party screen recording apps like XRecorder or AZ Screen Recorder.
- Consider using mirroring software to cast your Android TV screen to another device and record from there.
Remember, while third-party apps can be incredibly useful, always ensure you’re downloading from a reputable source to avoid any security risks.
Lastly, if you’re technically inclined, you could use the Android SDK to mirror and record your device’s screen on a computer. This method may require a bit more setup, but it’s a solid workaround for capturing your screen.
Looking to master Android screen recording? Our comprehensive FAQ section has all the answers you need! Whether you’re a gamer wanting to capture epic wins, a developer showcasing app features, or just looking to record precious moments, we’ve got you covered. Don’t miss out on expert tips and tricks – visit our website now for the ultimate guide to Android screen recording!
Conclusion
Screen recording on Android TV has become an accessible feature for users looking to capture their favorite moments, create tutorials, or share gameplay. With the built-in Android Recorder or third-party apps, the process is straightforward and customizable to your needs. Remember to locate the recorder button to start and stop your sessions, and access your video files with ease. Whether you’re a seasoned Android user or new to the platform, this guide should have equipped you with the knowledge to record your screen effortlessly. For any further assistance or queries, don’t hesitate to reach out in the comments section.
Frequently Asked Questions About Android Screen Recording
Can I record the screen on any Android TV?
Most modern Android TVs come with a native screen recording feature. You can usually access this by swiping down to the quick access panel and tapping the screen recording icon.
How do I start a screen recording session on Android?
To start recording, swipe down to access the quick access panel and tap on the Screen recording icon. Then, select the Android Recorder button to commence recording.
Do I need a third-party app to record my Android TV screen?
While native screen recording is available on many Android TVs, you may opt for a third-party app like XRecorder if you need more control over video quality and frame rate.
How can I access my screen recording after completing it?
Once you’ve stopped the recording, you can access the video file through your Android TV’s gallery or file manager. Look for the latest video file if it’s not clearly labeled.
Can I record without a watermark?
The native Android screen recorder does not apply a watermark. However, some third-party apps might. Check the app’s settings or consider premium versions to avoid watermarks.
How can I record with internal audio on Android?
Some Android TVs allow you to record internal audio through the native screen recorder. If not, some third-party apps offer this feature, but check for compatibility with your device.
What should I do if my Android TV doesn’t support screen recording?
If your Android TV doesn’t have a native screen recording feature, you can use third-party apps available on the Google Play Store to record your screen.
How do I ensure high-quality video when screen recording?
For high-quality videos, adjust the settings in your screen recording app to the highest resolution and frame rate your Android TV supports. Ensure sufficient storage space as well.